I have heard the masses crying out for a tutorial on how I painted my Necrons. Ask and ye shall receive! I just hope this makes sense…
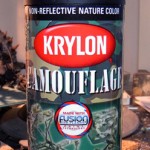
First let’s talk primer. I started miniature painting about 14 years ago, and most of that time was using GW’s primer. At first GW’s line of primer and paints were varied and reasonably priced, but somewhere along the line they got this wild notion that they could charge whatever they wanted. So over the years I’ve watched their primer creep from $5 to $15.75 a can. What the hell is in it? Magic? My favorite part is how they claim their primer has been engineered to work with their line of paints. WTF?
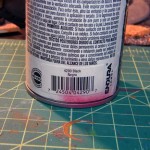
I was brought to the light from a friend in a local Hobby Shop of the existence of an alternative and I’ve never looked back. Enter Krylon spray paints.
This stuff is amazing. Not only does it bind to both plastic and metal, but also it goes on flat. This is the most matte paint I have ever used, and it works perfectly for all my projects. It’s also $4 a can.
Here we have a spray paint that is both reasonably priced, durable as hell, and can be found almost EVERYWHERE. Did I mention it comes in 6 colors? And this is just scratching the surface of the products that Krylon produces. My Dark Eldar scheme uses their Fusion line.
Get this stuff.
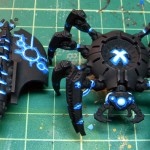
Now that I’m done ranting let’s get down to business! I decided to use a Canoptek Spider for this tutorial so you can see the techniques I used on a larger canvas.
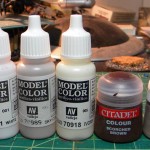
Miniature Color Palatte:
- VMC Black (70950) – Citadel Abaddon Black
- VMC White (70951) – Citadel White Scar
- VMC Sky Grey (70989) – Citadel Dawnstone
- VMC Ivory (70918) – Citadel Ushabti Bone & White Scar
- VGC Magic Blue (72021) – Citadel Kantor Blue
Base Color Palatte:
- Citadel Scorched Brown (Rhinox Hide)
- Citadel Calthan Brown (Mournfang Brown)
- Citadel Dheneb Stone (Rakarth Flesh)
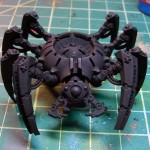
Step Zero – A nice even coat of primer. Make sure it’s not too humid outside so you don’t get that powered sand effect on your minis. I haven’t had that problem with the Krylon spray paints very often, but it can happen. Be carefull.
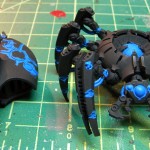
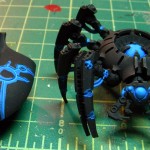
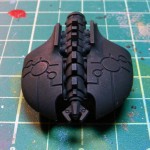
Step I – I targeted all the glowing bits; cables, eyes, orbs, and leg joints with VGC Magic Blue. You can also use Citadel Enchanted Blue (Caledor Sky) as alternative. Don’t’ worry about staying within the lines. We’ll clean up later.
Step II – 1/1 mix of VMC White and VGC Magic Blue. Don’t completely cover up the previous shade. Leave a little behind for depth.
Step III – 10/1 mix of VMC White and VGC Magic Blue. I’m guesstimating here on the ratio as I normally just eyeball it. Just put some white down on your palate and add a slight tip-full of the blue. The aim is for a very pale white-blue. Mostly white.
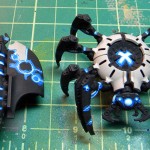
Step IV – Dheneb Stone for contrast. I use this color sparingly to break up the scheme. It usually takes 2-3 coats for full coverage over black. Make sure your paints are well diluted so you don’t lose detail.
Step V – Clean up phase. VMC Black was used to clean up my lines. I chose this black specifically because it is has a very matte finish, which syncs well with the flatness of the Krylon primer. You don’t have to use VMC paint here, but you will loose the effect if your paint is of a gloss or even satin finish.
Now for the step I assume everyone is looking for:
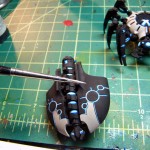
Step IV & VII – Edge highlights. VMC Sky Grey was painted onto all the hard edges of the model using the side, not the tip, of my brush. You’ll need a light touch to keep the line uniform but that’s it. Again, make sure your paints are well diluted so it goes on smoothly. You may need to apply two coats incase the line is not sharp. This technique is so easy you’ll kick yourself when you try it.
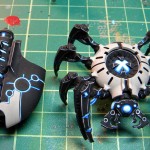
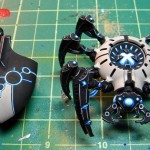
Step VIII – Highlight all the hard edges of the mini. The mandibles were a little finicky, but just focus on the edges. Clean up with black as needed. The inner ring under the back plate was highlighted using the brush tip. That’s a tricky spot so use a light hand and again, clean up with black as needed.
Step IX – Adding detail. I went back and added some more glowing blue effects on the spots I felt could use some detail. Just reapply steps I-III as needed.
Step X – Edge highlight using VMC Ivory on Dheneb plates. Line highlight were added to the edges of the detail on the abdomen as needed.
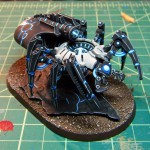
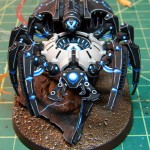
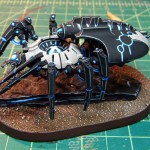
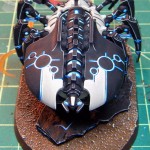
And there you have it! My Tkokt paint scheme.
I try to create a video for this scheme. I will try to emulate Les Bursley’s brilliant tutorial style if I can. I’ve never made a video tutorial before so give me a little time to make sure I get it right.
I hope you found this helpful. Please leave me feedback so I can polish this tutorial for when I move to video.
Shawn G. (SoI)
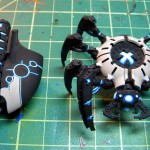
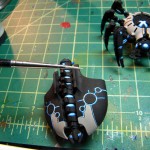
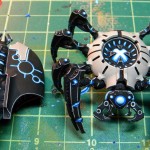
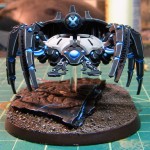
How did you achieve the… I want to call it rust, but your Necrons don’t use metal… red sand effect on the carapaces?
The Rust color is done with VMC Orange Brown (70981). Citadel Golden Yellow was added to the mix to highlight the edges.
Shawn G.
Thanks for the response. Your work is amazing, especially considering that the steps for your painting aren’t complicated. Simple and effective. Your idea that Necrons should be using synthetic materials is awesome, and makes a lot of sense.
Yesterday was the first day I started getting back into Necrons, and it happened to be the day you posted this. This really inspires me to try and paint some Necrons other than green everywhere + metal. That scheme was cool in 3rd edition, but now that style seems sorta… ugly.
Thanks so much for putting this stuff out here, and I look forward to seeing more.
Thank you for the totoural! It helped highly!
The Krylon Camo paint – you’re able to use that as primer? I’ve been using their gray primer and it’s worked well but I need to get my Ravenwing Speeders primed soon.
Greetings!
I do use the Krylon Camo spray as my primer. It’s excellent!
Shawn G.
Glad you found it helpful!
Shawn G.
Love your color scheme! How did you get the light blue to not cover up the darker shade beneath it?
I am new and don’t know what to do.
@ Pastafarious – You just have to be careful to not cover the color beneath with your highlight shades. It will take some practice to get the hang of it. Just go slow, make sure your paints are watered down well, and use a smaller brush until you get the hang of it.
If you find that you’ve made a mistake, just go back over them with the original blue and start again. Practice makes perfect.
Shawn G. (SoI)
which citadel paints could you use instead of the vallejo ones as i have gift voucher which i need to use
Just wondering about the colors. The pictures make it seem like the the light areas are White/Ivory, but if I’m reading correctly, you are using Citadel Dheneb Stone (Rakarth Flesh). Doesn’t seem right as Rakarth flesh is a lot darker than your pics. Are you mixing it with white?
@ Luke – I am completely unsure of the citadel line since they changed everything. GW had, in my opinion, the best red on the market (Blood Red) and they changed it. So sad. I’d have to do a side-by-side comparison of the colors before I could give advice.
@Bob – It’s Dheneb Stone. I use it right out of the bottles. Dheneb (Rakarth) appears darker then it dries. Give it a try, you’ll see what I mean. It’s highlighted with VMC Ivory 70918.
Shawn G.
I’ve recently started building Necrons and I instantly fell in love with the Thokt colours. I was just wondering, as a total painting newbie, if this guide could be applied to other Necron units (mainly warriors and immortals, just got the battle force set to get me started).
Kihaara,
It sure can. Just follow the same steps for any troop in the Necron range and you should get the same effect. I’ve used this scheme on just about every model they have to offer with success.
Feel free to ping me if you have questions.
Shawn G. (SoI)
Hi are there any similar colours to:
VMC Black (70950)
VMC White (70951)
VMC Sky Grey (70989)
VMC Ivory (70918)
VGC Magic Blue (72021)
from GW? Cause i wanted to use em from Gw
Kaine,
I updated the page to have the GW equivalents. You may also find this page useful:
Paint Range Compatibility Chart
Shawn G.
I saw in another Blog something of you and i wanted to ask what kind of Unit it is and from where is can get it or build it.
http://www.glaven.net/wp-content/uploads/2012/02/Nec_Ctan_01.jpg
That is a Great Bow Ushabti from the Tomb King line of Warhammer Fantasy. They come in a set of three in Finecast resin. I had some left over from an unfinished unit project and decided to add it to my Necrons.
Shawn G. (SoI)
“I try to create a video for this scheme. I will try to emulate Les Bursley’s brilliant tutorial style if I can. I’ve never made a video tutorial before so give me a little time to make sure I get it right.”
Is there any video tutorial made by you ?
Hi there,
First off great job looks great! I was thinking off a similar technique but reds instead of blue an the traditional green, give it that evil tinge.
But my question does anyone know if u can order red light sticks to replace the default green? as far as I know necrons don’t celebrate Christmas so the red an green thing..
haha but it would tie very thing in to a uniform colour an look great 🙂
Greetings,
I avoided the rods entirely with this army. I think you can get replacement rods from here: Evergreen Scale Models.
Shawn G. (SoI)
I have not yet. Been caught up with other projects and forgot. I’ll get around to it here soon.
Shawn G. (Soi)
Is that flat black Krylon at the top also a primer?? Or do you prime before you use the flat black?
Ahh I find them, miniwargaming http://store.miniwargaming.com/search.php?mode=search&page=1
red/blue tubes 3/32″ right size for infantry. 5/32″ for monolith.
the blue tubes would look nice for your guys!
i really love your scheme. may i ask how you did the “golden” parts on models like your overlord?
I really love your results! Do you think I would be able to pull off swapping the blues for oranges? I want to paint my necrons with the Sekemtar Dynasty color scheme.(Pg. 75 of codex.) If you think I could, I’d like your recommendation on what oranges I should use. To be perfectly honest this would be the first time I’ve ever painted any of my armies in the 6 or 7 years I’ve been playing warhammer, so I am quite the novice.
Hey Shawn,
I just started a Necron army and came across your website whilst searching for a paint scheme. I’ve begun to paint the army using this tutorial as a guideline. It’s going really well! I’ve given it my own personal flairs, but your approach and color palette holds through. I’d be glad to share the results when I’m done! Cheers and thanks!
You scheme is absolutely awesome. I’m going to use this scheme as it’s simply too cool.
I’m really curious to watch your tutorial once you’ll make it.
My only question is, as long as I don’t have a bigger view of an army painted with this scheme, isn’t it going to look too “black” and confusing?
Luca S.
Hey there !
I’m starting a Necron army and I had a color scheme similar to your, though I was thinking of using red instead of blue and ading some metallic parts on the models.
@Shawn
I was wondering if you could give some more details about how you paint the blue parts: are you diluting your paints a lot? are you using multiple layers for each step?
Woudl you have any advice about what color to use for a red equivalent of your scheme?
So far, I was planning on doing:
– base of Mephiston Red
– layer of Wazdakka Red (though it does not seem much lighter than the base)
– layer of Evil Sunz Scarlet
– finish with some Kindleflame dry for the very pale finish touch
I’m not sure the last step is the most suitabke (because of the type of the paint), maybe I should try the new “edge” Lugganath orange paint.
Any thoughts on that?
In any case, your blog is really great and already helped me a lot!
Nicolas
Wow, I am thoroughly impressed with your work. You have inspired me to paint my Necron army the same way. I was just about to post a few questions until i found this article. It’s very informative and I feel like I will be able to achieve this amazing color scheme. The only thing I’m a little worried about is the edge highlights and the white that gets added to the blue to give it a glowing effect. I just want it to look as good as yours! 😛 Once again, thanks again for the article and the awesome scheme. You’re very talented!
Hey, found this whilst looking for paint schemes and I think it looks awesome XD Do you have any videos or a youtube channel or anything/
Nice one. But how about adding some layers of glos varnish to eyes and optic elements? To get that glass glos.
Just starting out with Neckies and came across your colour scheme while looking for inspiration for mine. Definitely painting mine up like this, although I might change the odd thing here and there
Hi, good evening. Can you please tell me which large bases you’ve used with your Thokt Dynasty Necrons (Annihilation Barge, Destroyers, Canoptek Spyders)? Stunning work.
Cheers.
Johann
@Johann
Here are the base sizes:
A-Barge – 60mm
Destroyers – 40mm x 75mm
Spyders – 60mm x 100mm
A while back I made a set of bases from Dragon Forge Blanks. I wanted a full set of odd rounds that I could make for myself as needed.
Shawn G. (SoI)
Sorry to bump such an old post, but on the off-chance you still check it, I thought I’d ask.
Now that Dheneb Stone is gone, do you find Rakarth Flesh a close enough replacement? I’m torn between that and Vallejo Heavy Warmgrey.
Sorry for the late response! I have been busy as hell. In case you are still interested Rakarth Flesh will work. The warm grey from Vallejo is also excellent. I have been moving over to Vallejo colors as they are a more stable brand and don’t change names or discontinue shades very often.